With the seasons changing from Winter to Spring, we’ve been wanting to try our own spin on a cute, fun, and delicious dessert sandwich recipe that originated in Japan! They’re filled with fruit and whipped cream! We’d say getting everything prepped for this recipe is easy, but the patterns can be challenging so continue reading this blog if you need some visuals to support or watch our Youtube Short!
We tested a lot of different patterns with the fruit and came up with 2-3 solid designs that are easy and cute! With the added high quality Rodelle Vanilla Paste in the whipped cream, you get a hint of vanilla in every bite AND the flecks of vanilla seeds look gorgeous. If you’re out of vanilla paste, you can substitute with 1:1 ratio of Rodelle Pure Bourbon Madagascar Vanilla Extract!
-?-?-?-?-?-?-?-
Brief History on Fruit Sandwiches
Before we officially jump into the patterns, we thought it would be neat to share some of the history behind these delicious spring treats! Fruit sandwiches with whipped cream actually originated from Japan and have become a globally-popular dessert over recent years. Now you can find these sandwiches at bakeries, make at home, or even buy from your local convenience store. With more fruit becoming available in the early 1900s and the introduction to western style-food such as sandwiches in the late 1800s – someone blended the two together! People believe fruit sandwiches were developed specifically during the Taishō era between 1912 – 1926. There is speculation on exact origins or who developed the recipe but most believe this dessert started in Tokyo or Kyoto as these were the larger cities where many fruit shops were located. At the time this recipe was becoming popular in Japan, it was seen as an indulgent treat as fruit was more expensive BUT was still accessible to the public so a fruit sandwich with cream was usually given as a gift or purchased only for special occasions.
Now on to the patterns!
-?-?-?-?-?-
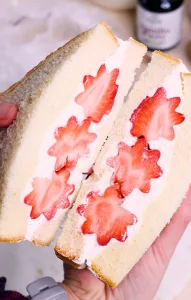
Strawberry Flower Design
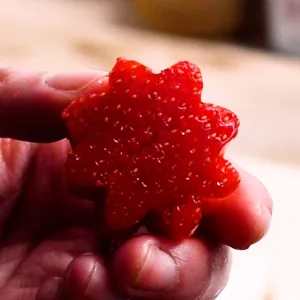
There are 2 designs we tried out solely with strawberries. For the above sandwich design we picked out the largest strawberries from the containers we bought and used a 1-inch flower cookie cutter to make this cute strawberry flower pattern. If you have an even smaller cookie cutter you can get away with using smaller strawberries! Another option is to cut off the green part of the strawberry head and use the full strawberry that way. You can make hearts if you cut a small sliver in the middle of the top part of the whole strawberry too!
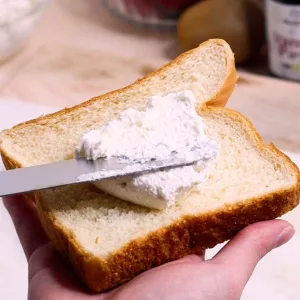
After you’ve prepped your strawberries, you’ll want to first pack on your first layer of vanilla whipped cream with a butter knife on the sandwich – about 1/4 inches thick. For bread we recommend something that’s thicker like shokupan or brioche which are both a bit sweeter than other breads. However, these can be made with regular wheat or white bread as well!
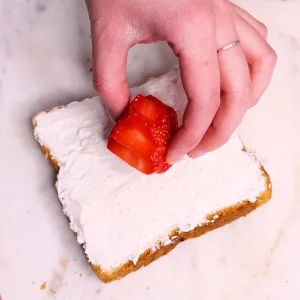
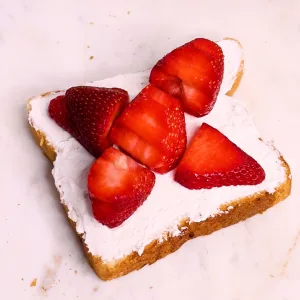
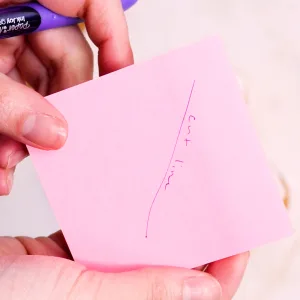
Place the bread with whipped cream on a cutting board or other clean flat surface so it’s in a diamond shape in front of you. For the strawberry cut outs, you want to have a row of fruit in the middle which is where you’ll cut. Lay them down as shown in images above. The cut line will be down the middle of the flower strawberry row – this way when you cut it you’ll see the flower shape pop out. We like to use a sticky note and place it to the side so we know the orientation of the cut line for later.
ALSO – we didn’t do this while filming but for the flower strawberry shape, we recommend adding another scoop of whipped cream on top of the strawberries laid down and spreading it gently over them so it gets into the crevices. If you don’t do this, you might end up with pockets of air in your sandwich like us! This isn’t necessarily bad but if you’re going for perfection – ya gotta do it!
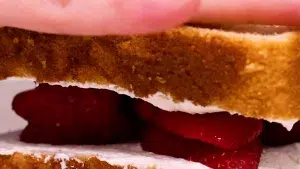
Next, place some whipped cream on the second piece of bread, same thickness as the bottom piece and lay it right on top of the other half! Gently press down on all sides, be careful not to smush the sandwich too much or it will be too flat! We’re not making panini fruit whipped cream sandwiches (but that is an interesting idea). Scrape the sides of excess whipped cream.
We’re going to list the next pattern below. If you want to know how to wrap and cut the sandwich – please look further down this blog post!
-?-?-?-
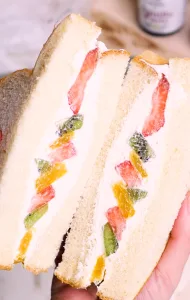
Assorted Fruit Pattern
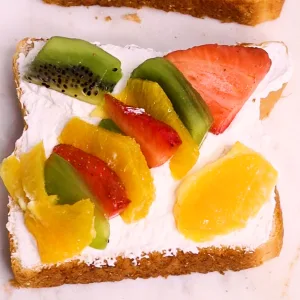
You need at least 2 different types of fruit for this pattern – we decided to use strawberries, oranges, and kiwis! Cut them into thin slices (1/4 -1/2 inches) if you can and lay them down in the center of your whipped cream bread in an alternating pattern. Fruit should be slightly overlapping each other when laying down! If you’re wanting a cleaner design you can always cut them into rectangular thin strips about 2.5 inches x 1 inch – domino shape. Okay, so weird comparison but we couldn’t think of any other way to describe them!
Next you can add another layer of whipped cream like with the strawberries or go straight to spreading whipped cream to your other bread slice and gently press it down on top of fruit. Remove excess whipped cream on sides.
-?-✨-?-✨-?-✨-
Freezing and Cutting Sandwich
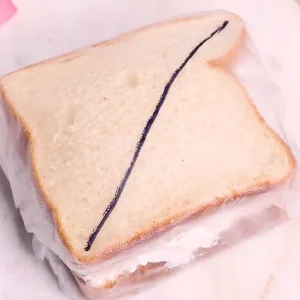
You’ll want to wrap the sandwich in plastic wrap to place in the freezer. To help with remembering your cut line, use a sharpie and draw a line where your sandwich will be cut on the plastic wrap. Freeze the sandwich for about 1 – 2 hours to help set the fruit in the sandwich and make it easier to cut. If you leave it in too long it will be hard as a rock and when thawing, will get soggy (eww). If you don’t let them set long enough, you’ll lose your fruit pattern in the center!
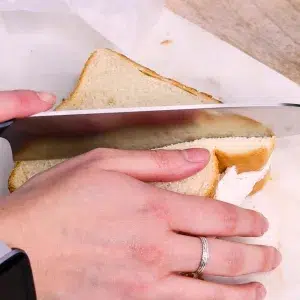
When you take out the sandwich(es) from the freezer, you can either take out of the plastic wrap or cut through it. You’ll want to remember where your cut line is and use a SHARP chef’s knife to cut it in half! If it’s dull it won’t be easy to cut and you’ll have more whipped cream showing on top of the fruit design. You’ll want to saw gently back and forth, lightly pressing on the bread with your other hand for support, cut until you’re all the way through the sandwich. Then the big reveal happens!
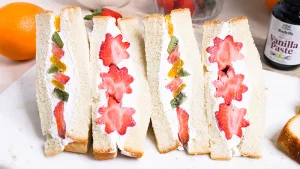
It’s so satisfying to see the design come out at the end of all that work involved! Like, look how cute they are! It’s worth all the effort in our opinion, like perfect for a picnic date or to surprise your kids when they look inside their lunch box. If you try this recipe out, let us know how it goes – share it on socials or email us at rodelle-marketing@adm.com.
Cheers to it being Spring and happy cute sandwich making!
XOXO,
Rodelle Marketing Team