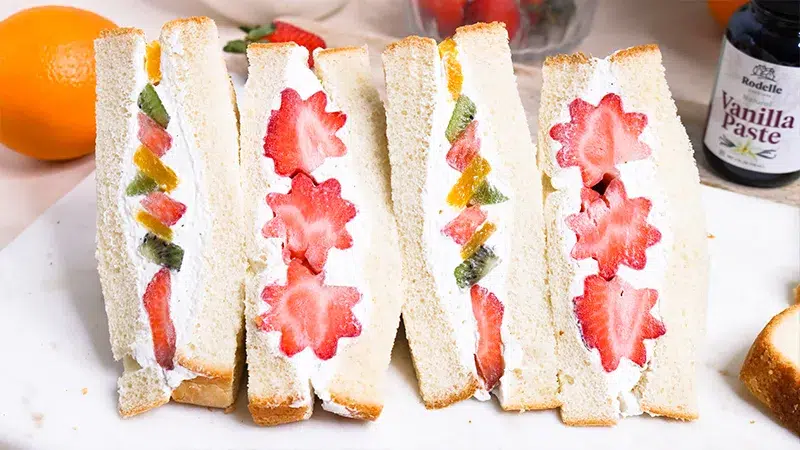
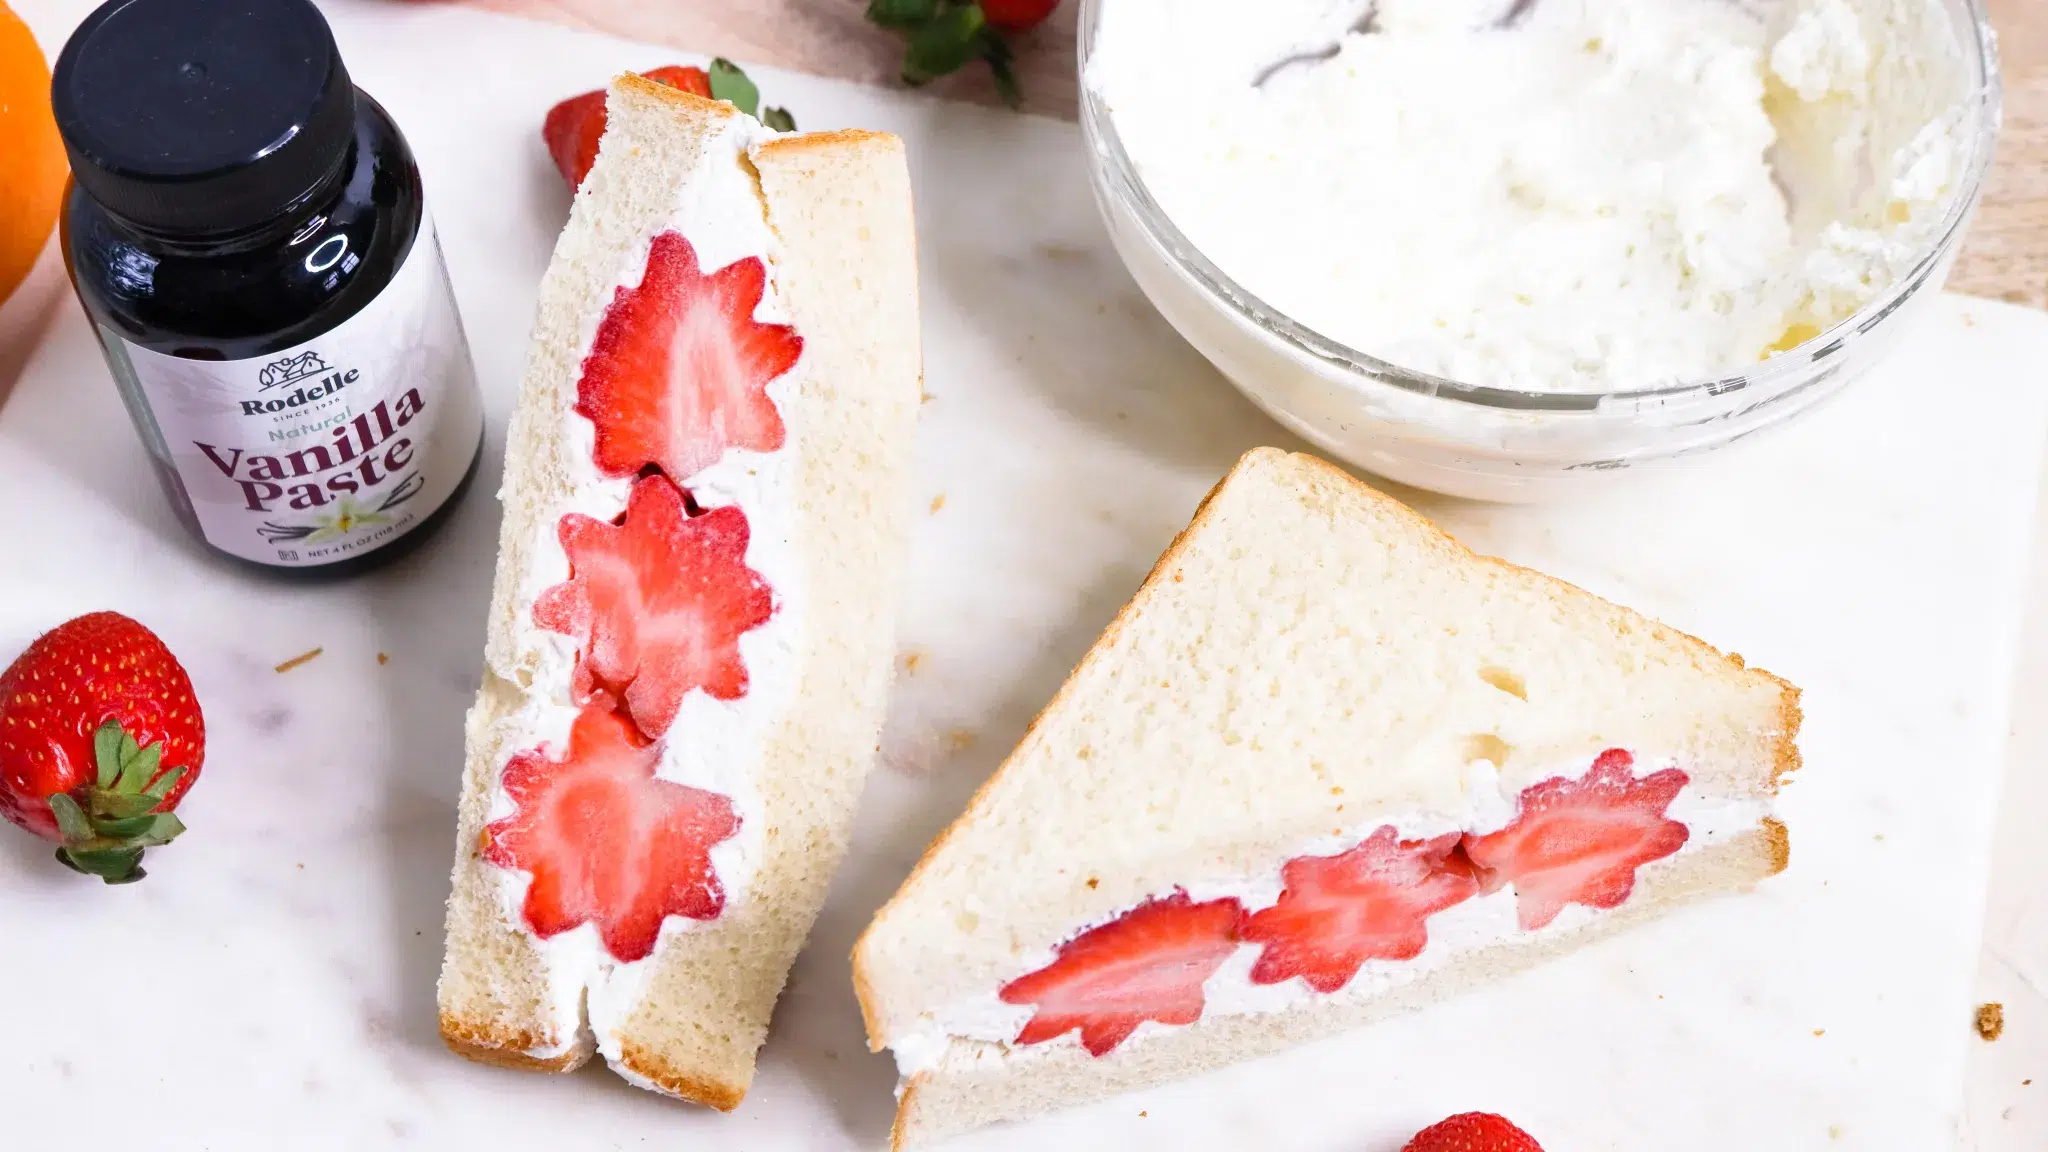
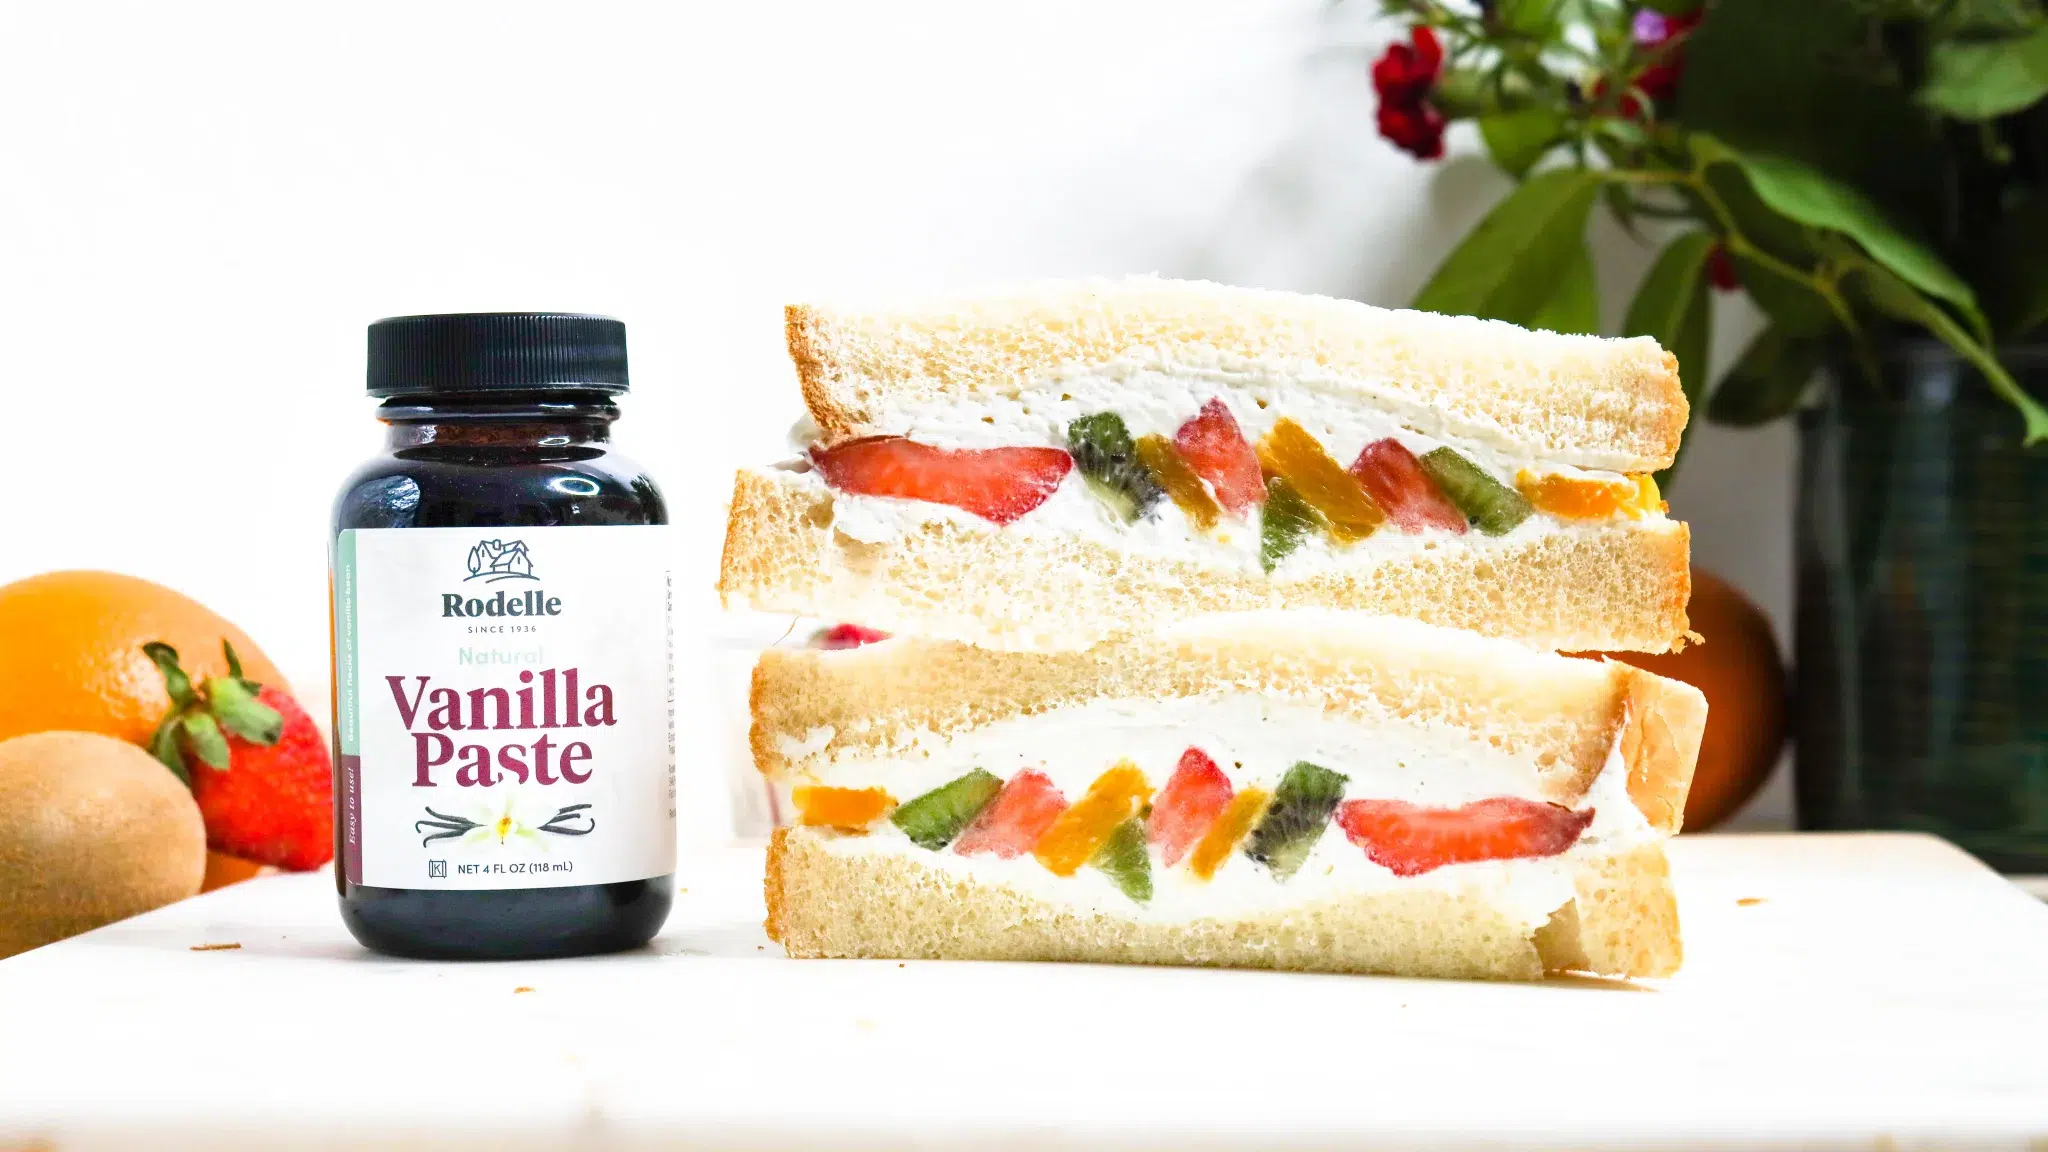
Take these cute sandwiches on your next picnic or tea get together or maybe pack one for lunch! Originating from Japan, our version of a fruit sandwich with vanilla whipped cream is light and fluffy in texture and contain a hint of vanilla with every bite. With the added fruit, you have a refreshing sweet treat! We’ve created two unique designs for these sandwiches that you can build. Use the fruit we suggested or pick your favorite! 

To see how we built these sandwiches, check out our blog post with step-by-step info and pics (plus some history on Japanese fruit sandwiches) OR watch our Youtube Short! 


Ingredients
  • 4 slices shokupan (Japanese milk bread) or brioche 
  • 1 cup heavy whipping cream 
  • 2 tablespoons granulated sugar 
  • 1 teaspoon Rodelle Vanilla Paste 
  • 10 strawberries (pick out larger strawberries if you plan on using cookie cut outs) 
  • 1 kiwi 
  • 1 navel orange  
Uses
Occasions
Directions

Directions (please read the ‘notes’ section first and look at the pattern direction at the bottom before assembling): 

  1. Prepare your fruit (See below for design options). 
  2. Add heavy cream and sugar to a stand mixer and beat until soft peaks form, add Rodelle Pure Vanilla Paste and beat until stiff peaks form, careful to not overbeat. 
  3. For the next step, ensure to keep track of where you’ll need to cut the sandwich with the fruit pattern in the middle – we keep track of the sandwich orientation and where to cut with a sticky note. Add about ¼ inch layer of whipped cream to one side of the bread, your fruit design (see below for pattern assembly details), and another layer of whipped cream to cover all of the nooks and crannies of the fruit. On the other slice of bread, add another layer of whipped cream and lay on top, creating the sandwich. 
  4. Repeat with the other two slices of bread. DO NOT CHANGE THE ORIENTATION OF YOUR BREAD 
  5. Wrap the sandwich up tightly with plastic wrap, keeping the same orientation, and add a cut line with a marker on the plastic indicating which direction the cuts should be made.  
  6. Freeze wrapped sandwich for at least 30 minutes, but no longer than 2 hours. If the fruit freezes it will be harder to cut. 
  7. When ready to serve, remove sandwich from freezer, and with a very sharp knife slice the crusts off if preferred. Then slice where you previously marked on the plastic wrap. If cutting through the plastic is too difficult, you can remove it and set it aside as a reminder of the orientation of the sandwich and cut as previously mentioned.  
  8. Remove plastic wrap and serve immediately.  


Notes:  

  • Keep in mind while making this, that the design needs to face horizontally, not vertically (meaning you don't want your fruit design to face you, you want it to face the wall), so that when you cut it, the design shows through! 
  • We recommend using thicker bread to make these sandwiches, but you can use regular white bread as well! 
  • We recommend eating these within 1-2 days as the bread will begin to get soggy in the middle. You can make the night before, cut it, and place in an airtight container or wrap in cellophane the night before and eat the next day.   
  • If you don't have Rodelle Vanilla Paste on hand, you can substitute with Rodelle Pure Madagascar Bourbon Vanilla Extract - it's a 1:1 ratio.
Simple 
 Strawberries  Core strawberries. On a layer of bread with whipped cream placed diagonally, add a row of strawberries down the middle, and add an extra strawberry on each side of the center (it should give an X appearance), keeping all of the strawberries in the same orientation, add a layer of whipped cream to fill any gaps to finish. 
  A small cookie cutter can also be used for this. Just cut through the widest part of the strawberry, and place on the diagonal of the bread, ensuring the design is facing horizontal (so that when it's cut, it'll be visible). Be sure to fill any gaps the cookie cutter creates with whipped cream. 
   
Layered 
Strawberries/Orange/Kiwi  Strawberries 
  Core strawberries and slice into pieces ~1/4" thick. On a layer of bread with whipped cream placed diagonally, add a strawberry at the top, and continue to layer, overlapping a little over the previous row until you reach the edges of the bread. Add a layer of whipped cream on top to fill any gaps to finish 
  Orange 
  Slice ends of the orange off and peel, removing the pith as much as possible. Slice into pieces ~1/4" thick, cutting in the same direction as the segments. On a layer of bread with whipped cream placed diagonally, add a layer of orange slices, overlapping a little over the previous row until you reach the edges of the bread. Add a layer of whipped cream on top to fill any gaps to finish 
  Kiwi 
  Peel kiwi and cut in half, slice each half into pieces ~1/4" thick. On a layer of bread with whipped cream placed diagonally, add a layer of kiwi slices, overlapping a little over the previous row until you reach the edges of the bread. Add a layer of whipped cream on top to fill any gaps to finish 
  Mix 
  Cut each fruit as mentioned above and place a row down, alternating each row to a different fruit, overlapping a little over the previous row until the end of the bread slice. Add a layer of whipped cream on top to fill any gaps 


Recipe was prepared for Rodelley by Shelby Jenkins at @gooey.in.the.middle. Photos taken by Kathryn Herndon at @kniftykat